So, you have finished building your SvelteKit app and now want to unleash your brand spanking new app to the world? Or, you just want to try deploying first so that you are prepared when deploying the real thing?
There are plenty of methods to deploy your app, some easier than others and some are slightly more complex but easier to maintain later. However, today, we are going to focus on how to self-host your SvelteKit app on a Virtual Private Server, specifically a Linux Ubuntu server.
Even self-hosting has a lot of decisions to be made before you can deploy your app, with some choices and methods of deployment being a lot more complex than others (for good reason though).
However, if this is your first time deploying a SvelteKit app by yourself, going for more complex deployment may feel like a daunting task. And I absolutely agree with that. There are plenty to learn, even if you have been already programming for some time, especially if you lack experience in the devops side.
So, today, we are going to learn the most basic, easiest and the most direct way to quickly self host your app on your own virtual private server. By the end of this tutorial, you should be able to proudly see your app hosted online on a domain of your choice and share it with everyone.
Prerequisites
- We are using Windows as the local development machine
- We will be deploying a SvelteKit 2 app only.
- We will be using adapter/node only.
- We will start from a newly installed Linux Ubuntu 24.04 server.
- No external firewall from your server provider
- We will start from scratch, no server yet.
- We will not use docker (for now)
1. Preparing your app for deployment
1.1. Ensure your env files are correct and uses Static variables
Before we actually build and compile the SvelteKit app, it is worth mentioning that you check your .env (or .env.production) file first to ensure that you have correctly set any API keys or secrets correctly. Make sure all private variables stay private and are only accessible from the server-side.
For the purpose of this tutorial, only use static variables, so that the environment variables were built during build time instead of during run time. This simplifies a lot and lessens that chance of you accidentally making mistakes and wonder why things do not work. You can go for dynamic environment variables later when you are comfortable with deploying the app.
1.2. Build the app
All good? Now let us proceed with building the app.
Luckily, it is easy for us to build a SvelteKit app. Simply run the following command in your terminal:
npm run buildBy running the above command, node will read the .env.production file if available, or .env file as a fallback, for the environment variables.
If the build is successful, the production files will be available in the build/ folder.
If the build fails, you will need to rectify the errors and try building again before proceeding to the next step.
1.3. Archive the required files and folders
Now that we have a production build of the SvelteKit app, we can now prepare for deployment. Now, I know that we already have the build/ folder that we compiled just now, but there are other files and folders that we need to make available in the production server to ensure that the SvelteKit app runs.
The files and folders that need to be in the production servers are:
build/
node_modules/
package.json
package-lock.json
To make it easy for us to upload to the production server, we will archive the files (using tar gz) using the following command:
tar -czf publish.tar.gz build node_modules package.json package-lock.jsonIf successful, all of the needed files and folders is available inside publish.tar.gz.
Okay, we’re done preparing and packaging our app for deployment. Let us move to the next step.
2. Purchase Linux Server
2.1. Get Linux Ubuntu Server VPS
First, what you have to do is get a Linux Ubuntu 24.04 Server VPS.
Feel free to use any server provider that you like. However, if you are using Vultr and need a video walkthrough, you can follow this video: How to Provision a Windows Server (But make sure to select a Linux Ubuntu 24.04 server instead).
After getting a Linux Ubuntu 24.04 Server VPS, you need to get these:
- IP address of your server
- Username and Password (for SSH access)
3. Domain
3.1. Buy Domain
If you have not already, purchase your domain from your favourite domain provider. It does not matter which provider you choose so simply pick whichever provider you are most comfortable with.
You can follow a video guide here: How to Buy Your Own .com Domain Name on Namecheap
3.2. Update your DNS
You will now need to update your DNS server to point towards your new server. This is slightly a bit out of scope for the current tutorial since there are a lot of domain providers out there. You will need to look for the settings inside your domain provider, select your domain and find the DNS settings. Set the A record to the IP of your server.
4. Accessing your Linux server
So, we have already provisioned a Linux Ubuntu server. So, how do we actually access it?
4.1. Install SSH Client: PuTTY
To access a Linux Ubuntu server, we usually do a SSH connection using a SSH client.
One of the most populate SSH client is PuTTy. So, simply download the latest PuTTY client and install it into your computer.
4.2. Access your server
Once installed, open tu PuTTY program. You should see a screen like this:
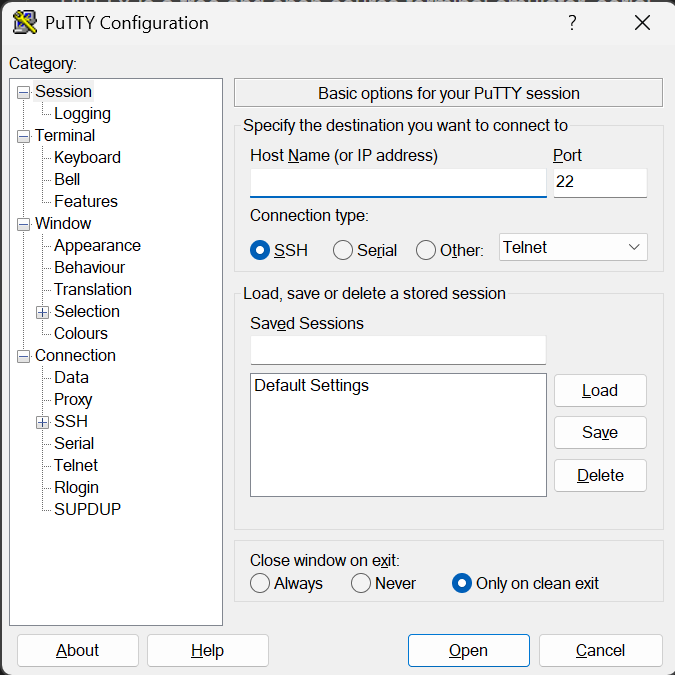
In the Host Name field, fill in your IP address. Ensure that the connection type is SSH, then click Open.
Afterwards, when prompted, fill in the username and password of your production server.
—
Okay, so before we continue, let us recap what we have managed to achieve:
- We have built the app and prepared the files to be hosted on the production server
- We have a Linux Ubuntu server up and running
- We have purchased a domain
- We have pointed the domain towards our new production server
- We can now access the server via SSH by using PuTTy
If you haven’t completed any of the above, make sure to complete them all so that it will be easier for you to follow along this tutorial later.
—
5. Set up Linux server
Okay, so finally we can actually start with installing and configuring our production server. There are several packages and softwares that we need to install on our Linux Ubuntu server so that we can self-host our SvelteKit app.
- Node Version Manager (and consequently, Node)
- pm2 - Our process manager that will manage our process
- Caddy Server - This will be our web server.
5.1. Node Version Manager and Node
Since a SvelteKit app is a Node app, we will need to install Node on our production server to be able to run our SvelteKit app.
5.1.1. Check Node version of your SvelteKit app
Before we install Node, we should check the node version that you used to build your app. We should install the same Node version on the production server so that everything works as expected.
On your local development machine, open terminal and write the following prompt:
node -vYou will then get the node version that was used to build your app. Take note of the Node version.
5.1.2. Install nvm (Node Version Manager)
Back to our production server. We want to install the same node version as what you have in your development machine. And the best way to install Node is using Node Version Manager.
To install Node Version Manager, use the following command in your production server:
curl -o- https://raw.githubusercontent.com/nvm-sh/nvm/v0.40.4/install.sh | bashAfter successfully installing, you can verify by using the following command
nvm lsIt will list down a list of node versions you have installed, which is currently none.
5.1.3. Install node
Now that we have successfully installed nvm, we can now install node on our production server. To ensure our SvelteKit app runs swimmingly, we should just install the same node version as the one you have in your development machine.
If the node version you used to develop is 22, then use the following command:
nvm install <version>For example, if the version is 24, then use the following command:
nvm install 24After successfully installing, you can use that node version by running the following command.
nvm use <version>For example, if the version is 24, then use the following command:
nvm use 24To ensure that you have successfully installed node, just run the following prompt.
node -v…and ensure that the version is the same major version as the one in your local development machine.
5.2. pm2
pm2 is a process manager that we can use to manage the processes of node applications. It is handy in the sense that you can configure it to restart any processes that crashed and also handle any restarts that may happen.
To install pm2 is easy. Simply use the following command.
npm install pm2 -g5.3. Uncomplicated Firewall (ufw)
Before we go to the next step, it would be best to configure our firewall first. Depending on your server provider, Uncomplicated Firewall (ufw) may or may not be enabled by default.
To check whether ufw is already enabled or not, simply use the following command:
sudo ufw statusBasically these are the only commands you will need to do:
Make sure the firewall allows SSH connections first:
sudo ufw allow OpenSSHNext is to allow HTTP and HTTPS connections by allowing port 80 and 443:
sudo ufw allow 80,443/tcpThen, if ufw is not enabled yet, just enable the firewall with this command:
sudo ufw enableTo check the status of the firewall, you can use this command:
sudo ufw statusDone, you have turned on firewall, allowed SSH connections into the server, allowed HTTP and HTTPS connections into the server and verified the the firewall is working correctly.
5.4. Caddy server
Caddy server is a web server that we will use to handle HTTP and HTTPS requests. There are several other web servers (notably apache and nginx), but I have found that Caddy server requires the least configuration and the fastest one to get up and running. It will even automatically set up SSL certificates without any other configurations required from you.
You can read the Caddy Server Getting Started guide if you would like to try it yourself at first.
To install Caddy Server as a systemd service (which means caddy server will be a background service that always runs), you will need to run the following commands:
sudo apt install -y debian-keyring debian-archive-keyring apt-transport-https curl
curl -1sLf 'https://dl.cloudsmith.io/public/caddy/stable/gpg.key' | sudo gpg --dearmor -o /usr/share/keyrings/caddy-stable-archive-keyring.gpg
curl -1sLf 'https://dl.cloudsmith.io/public/caddy/stable/debian.deb.txt' | sudo tee /etc/apt/sources.list.d/caddy-stable.list
sudo chmod o+r /usr/share/keyrings/caddy-stable-archive-keyring.gpg
sudo chmod o+r /etc/apt/sources.list.d/caddy-stable.list
sudo apt update
sudo apt install caddy
You can verify or get the latest commands from the Caddy Server installation guide for Ubuntu.
Once you have successfully installed Caddy server, you can verify that Caddy server is running with the following command:
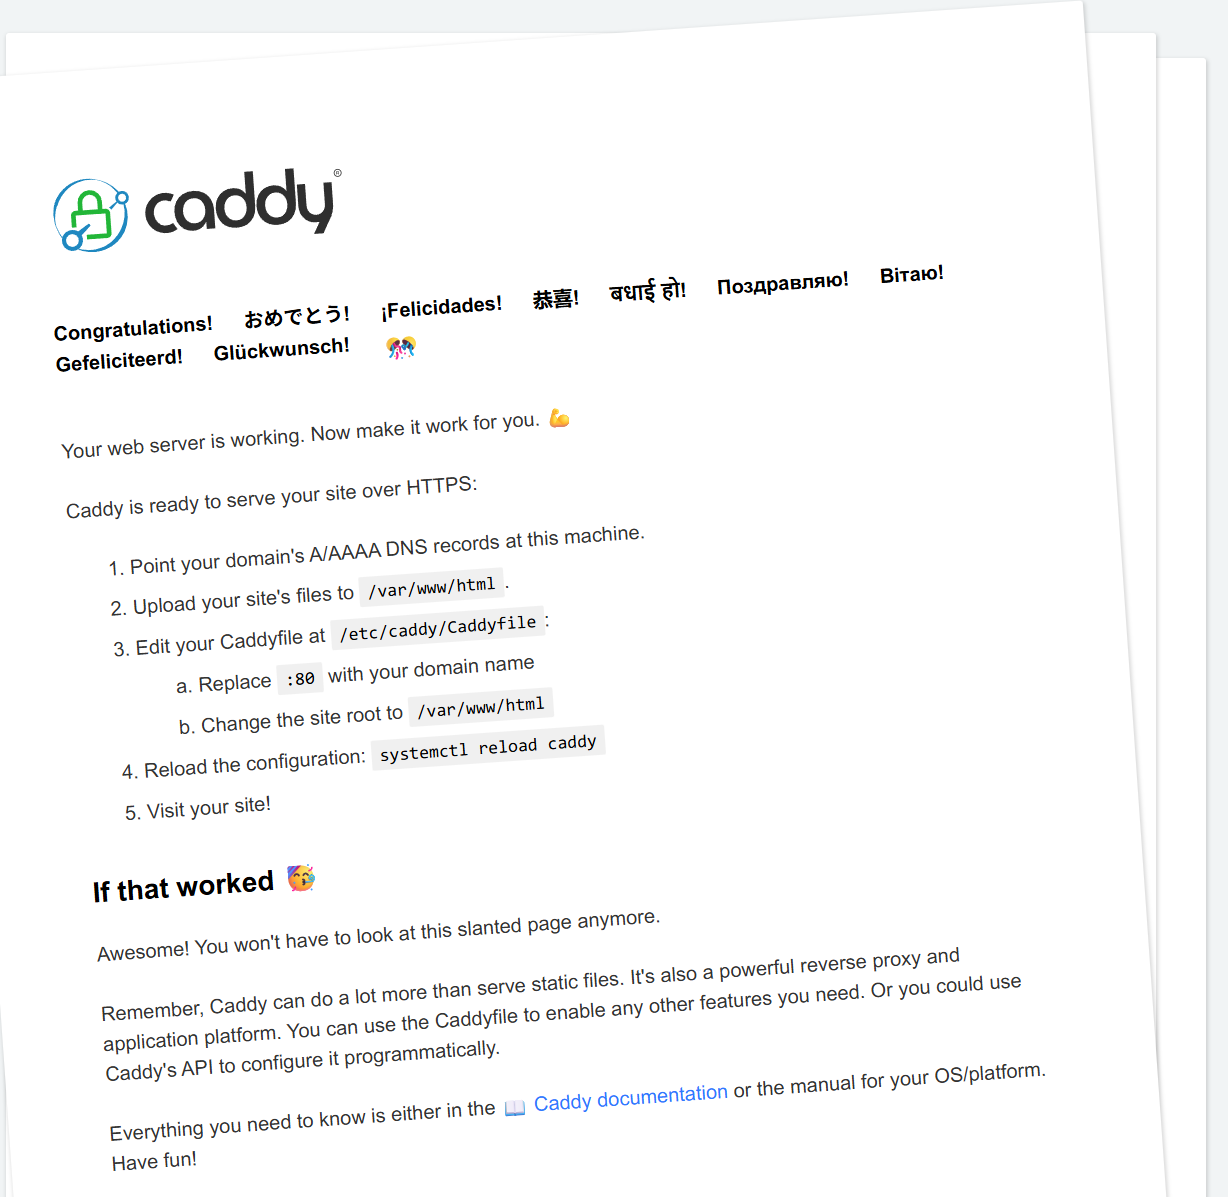
systemctl status caddyYou can also verify by browsing to the IP address of your server on your browser. If everything is okay, you should be seeing the default caddy server page, welcoming you to your server.
More important commands are available here.
—
Phew! So we are done installing all the important components for us to self-host our own web server on a virtual private server. Now we have all the ingredients we need to actually run our SvelteKit app on our server.
—
6. Upload Files to Production Server
Remember the publish.tar.gz file that contains our compiled app? Finally, it is time for us to actually bring it to the production server. So let us do just that.
6.1. Create folders
But.. Before uploading our files, let us create folders to place our files.
This is the way I prefer to structure the folders in my servers:
/srv/[domain]/www
/srv/[domain]/misc
With the www/ folder containing the deployed app files, while the misc files is a temporary folder we use to upload files required for the app to be served.
Example if my domain is miaw.xyz:
/srv/miaw.xyz/www
/srv/miaw.xyz/misc
You can create the folders with this command:
mkdir /srv/[domain]/www
mkdir /srv/[domain]/misc
This is simply by preference, so feel free to use a different structure or put your files and an entirely different place, it does not really matter much.
6.2. Get your publish.tar.gz
Remember the publish.tar.gz file that you have done in step 1.3? In your local development machine, use command prompt and navigate to the folder that has that file. We will be doing our uploading all through command prompt.
6.3. Upload to server
To actually upload the publish.tar.gz file to the server, we can use the scp command (Secure Copy).
Make sure you have all these items in your hand:
- Username to login to your production server
- Password to your production server
- IP address of your production server
- The path you want to upload the file to (in this example, we will upload to /srv/miaw.xyz/misc)
In your local development machine, run this command:
scp publish.tar.gz [username]@[ipaddress]:[path]With path is the path towards the misc folder of the folders you have made in step 6.1.
Example:
scp publish.tar.gz root@123.123.123.123:/srv/miaw.xyz/miscIt will ask you the password for the user. Fill in the password and let it run until the file has been uploaded to the server.
6.4. Untar on server
Alright, we successfully uploaded our archived file. So what is our next step? Yes, we will need to unarchive it.
So, SSH to the server again (using PuTTy of course). We will now untar the publish.tar.gz files and folders into the /srv/[domain]/www/ folder
In the production server:
tar -xzvf /srv/lazyeyechess.com/misc/publish.tar.gz -C /srv/lazyeyechess.com/www/It will unarchive the contents of the publish.tar.gz into the www/ folder (without including the ‘publish’ folder).
The resulting files and folders inside /srv/[domain]/www/ will look like this:
build/
node_modules/
package.json
package-lock.json
6.5. Success
Finally, all of our files are there in the server and ready to be served.
7. Configure Services to Serve
Now that we have our SvelteKit app in the production server, let us move to actually configuring the services that we have installed previously to serve our app.
7.1. Run the SvelteKit (node) app with pm2
Remember pm2 process manager that we have installed previously? We will now use pm2 to run and manage our SvelteKit app process.
7.1.1. Start Process
Starting the process is easy enough with pm2.
Navigate to the folder containing the app’s index.js file.
cd /srv/[domain]/www/build…then run your SvelteKit app using this command:
PORT=$(app_port) pm2 start index.js --name $(app_name):$(app_port)Replace the ports and the file name using whatever port or name that you prefer. I usually just leave the application name as the domain. The actual port does not matter, but you should use ports that are not used. Usually anything above 3000 should be safe.
For example, if I would like to host my SvelteKit app in port 3030 and the name of my app is miaw.xyz, then the following would be the command:
PORT=3030 pm2 start index.js --name miaw.xyz:3030After executing it, your app is now running on port 3030.
7.1.2. Validate
You can validate the your app is running by using the following command:
pm2 ls7.1.3. Ensure it runs again on reboot
Now, if you leave pm2 like this, if somehow the server is reset, your processes will not be running again. So, to ensure your apps runs upon any server reboot, run the following command:
pm2 startuppm2 will then generate a startup file so that it will start the processes upon any server restarts.
7.1.4. What if I need to restart the process
To restart any process, simply use the following command:
pm2 restart $(app_name):$(app_port)For example, if the name of the app is miaw.xyz:3030, just run the following command:
pm2 restart miaw.xyz:30307.1.5. Done with pm2
Yes, we are done with setting up pm2.
7.2. Caddy Server
Finally, it is now time to configure Caddy server to direct any requests towards our server for our domain towards the port that the process is being served at. We are at the last hurdle, folks!
7.2.1. Caddyfile
To configure our Caddy server, we will need to edit the Caddyfile, which contains the configurations for our web server.
The Caddyfile is available at the following path:
/etc/caddy/CaddyfileSo we will just cd to the folder using this command:
cd /etc/caddyWait, how do we edit the file? You can use any editor you like, but my preference is using nano. It should already be installed, so you should be able to simply run the following command:
nano CaddyfileAnd you should see a screen like this:
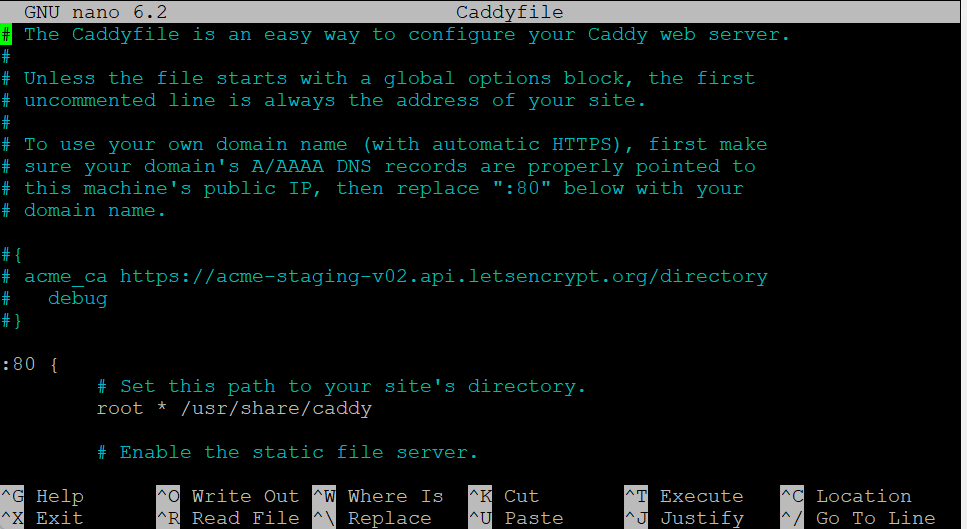
We will now edit the Caddyfile to send requests received by the server for our domain to point to our application’s process.
Simply add these lines (change the domains and ports accordingly):
[domain] {
  reverse_proxy * localhost:[port]
}
If for example, our domain is miaw.xyz and we hosted on the port 3030, these are the lines to be added:
miaw.xyz {
  reverse_proxy * localhost:3030
}
To save your changes, press Ctrl + s . And to exit the text editor, press Ctrl + x.
7.2.2. Reload Caddyfile
Alright, we have just edited the Caddyfile, but the configuration will not be updated until we reload the Caddyfile. To do that, ensure that you are already inside the /etc/caddy folder.
cd /etc/caddy…and then, reload by using this command:
caddy reloadPhew!
8. Yayyy!! We’re Done!
If all goes well, then you should be done with everything!
Now, open your domain name using your browser and verify that everything is in order.
Congratulations! You have successfully deployed your app! See, this wasn’t so bad, right?
What Else?
The following are additional information or things that you might want to do for your production app.
Set up Firewall using Uncomplicated Firewall (ufw)
It would be prudent to set up firewall for your server, if you have not.
Basically these are the only commands you will need to do:
Make sure the firewall allows SSH connections first:
sudo ufw allow OpenSSHNext is to allow HTTP and HTTPS connections by allowing port 80 and 443:
sudo ufw allow 80,443/tcpThen, just enable the firewall with this command:
sudo ufw enableTo check the status of the firewall, you can use this command:
sudo ufw statusWhat if I want to update the app again?
If you would like to update the app again, all you need to do is:
- Build the app (Step 1)
- Upload the files (Step 6)
- Then, reload the app in pm2 (Step 7.1.4)
I want the www subdomain of my app to redirect to the non-www domain
If you have follow this tutorial, you would have realized that even though going to your domain.com works, typing www.domain.com does not work.
This is because the www.domain.com is a sub-domain, and you have to redirect the www version yourself.
To do that:
Update DNS Record
Update your DNS record to also point www towards the server.
Add a A record, make sure the host name is www and set it to point to your production server.
Configure Caddy server to redirect
The next step is to tell Caddy server to redirect any requests to the www version of the domain towards the non-www version.
Open Caddyfile and add these lines below your current record:
www.domain.com {
  redir https://domain.com{uri} permanent
}
Make sure to replace domain.com with your own domain.
What happens here is that we added a www.domain.com record. Then, we tell Caddy server to redirect requests made to www.domain.com towards the domain.com and include the URI too. Meaning, if the request is www.domain.com/blog?post=123, then the user will be redirected to domain.com/blog?post=123.
The permanent means it will be a 301 permanent redirect, which signals browsers that they can cache the target URL to reduce number of requests in later requsts.
What are the drawbacks of this method?
This is pretty much the most basic way on how to deploy your app and how an app is served to the world wide web in traditional sense. By understanding this method, you are now well equipped to understand more complex methods of deployments.
The drawbacks are pretty clear:
Manual deployment
You will need to manually deploy each build, so that would take plenty of time, especially when using a non-GUI server like Linux. Some would disagree though.
Server updates
Self hosting in your own virtual private server will require you to ensure that your build will work well in production environment. This usually means you yourself would need to ensure that the server’s node version should be the same as your local development server by yourself. Inadvertently updating your local node version may result in your production build not working in your production server.
However, after being comfortable with this, you can now explore deploying using a Continuous Integration / Continuous Deployment pipeline such as Azure Pipelines or Github Actions (which will solve the manual deployment problem) or using Docker and dockerize your app (which will solve the server updates probllem).